
Creating a Verifier+ Account
Introduction:
This guide will help you create a new Verifier+ account.
Creating a Verifier+ account
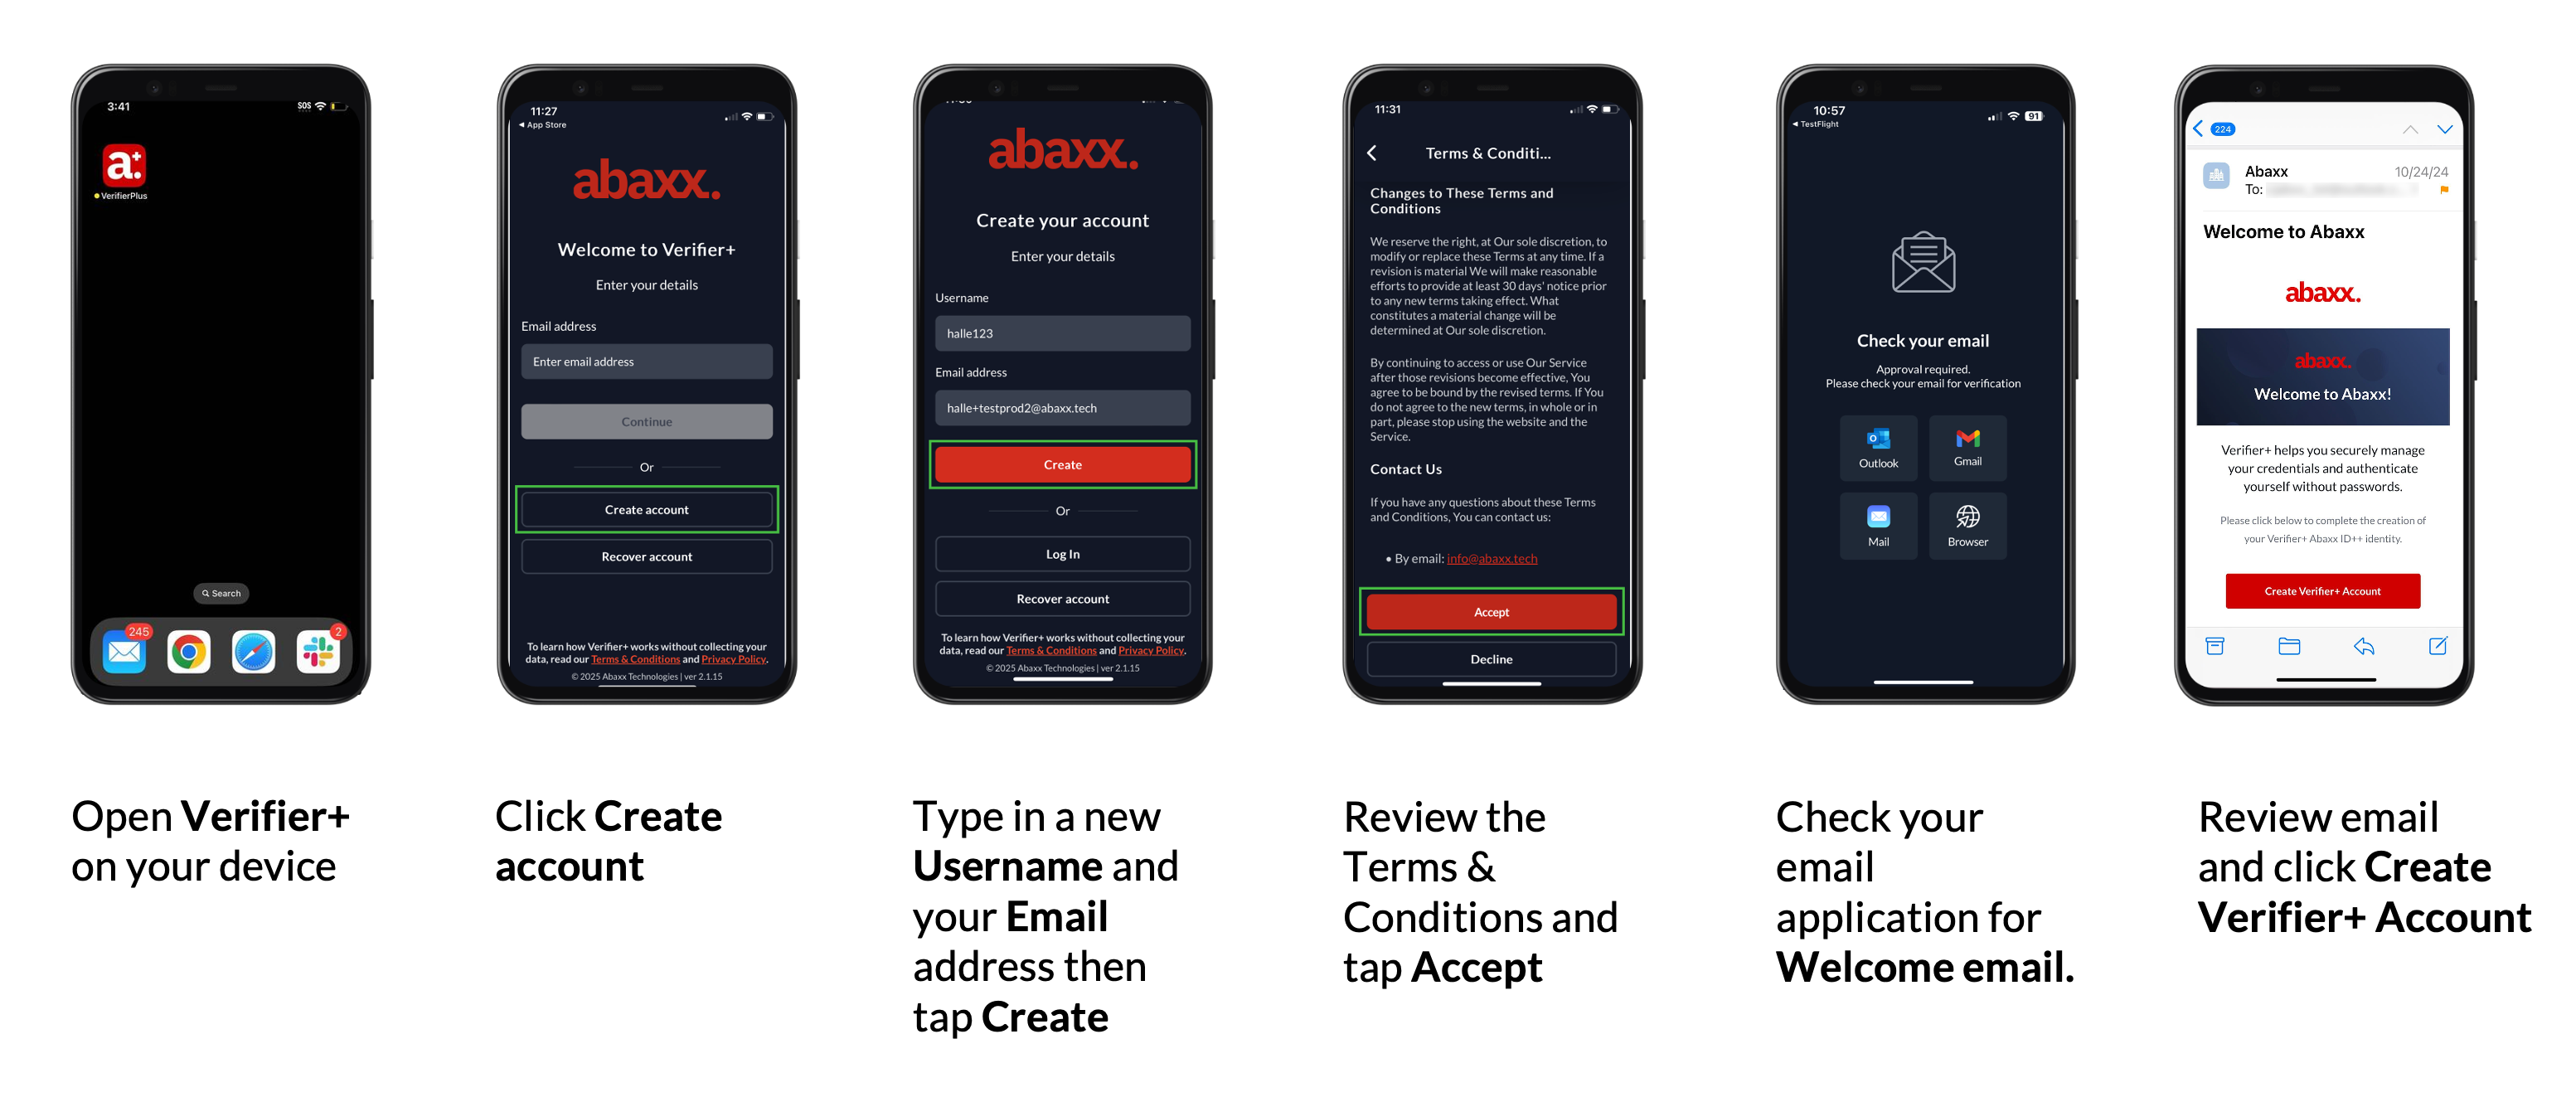
Step 1: Open Verifier+ and Tap “Create Account”
Launch Verifier+ on your device and tap "Create Account".
Step 2: Enter Your Username and Email Address
Type in a new username and email address, then tap "Create".
Step 3: Review and Accept the Terms and Conditions
Review the terms and conditions, then tap "Accept".
Step 4: Check your Email to Finalize Account Creation
Open your email application to find the Abaxx Welcome Email.
Review the email and click “Create Verifier+ Account”.
Completing the verification process
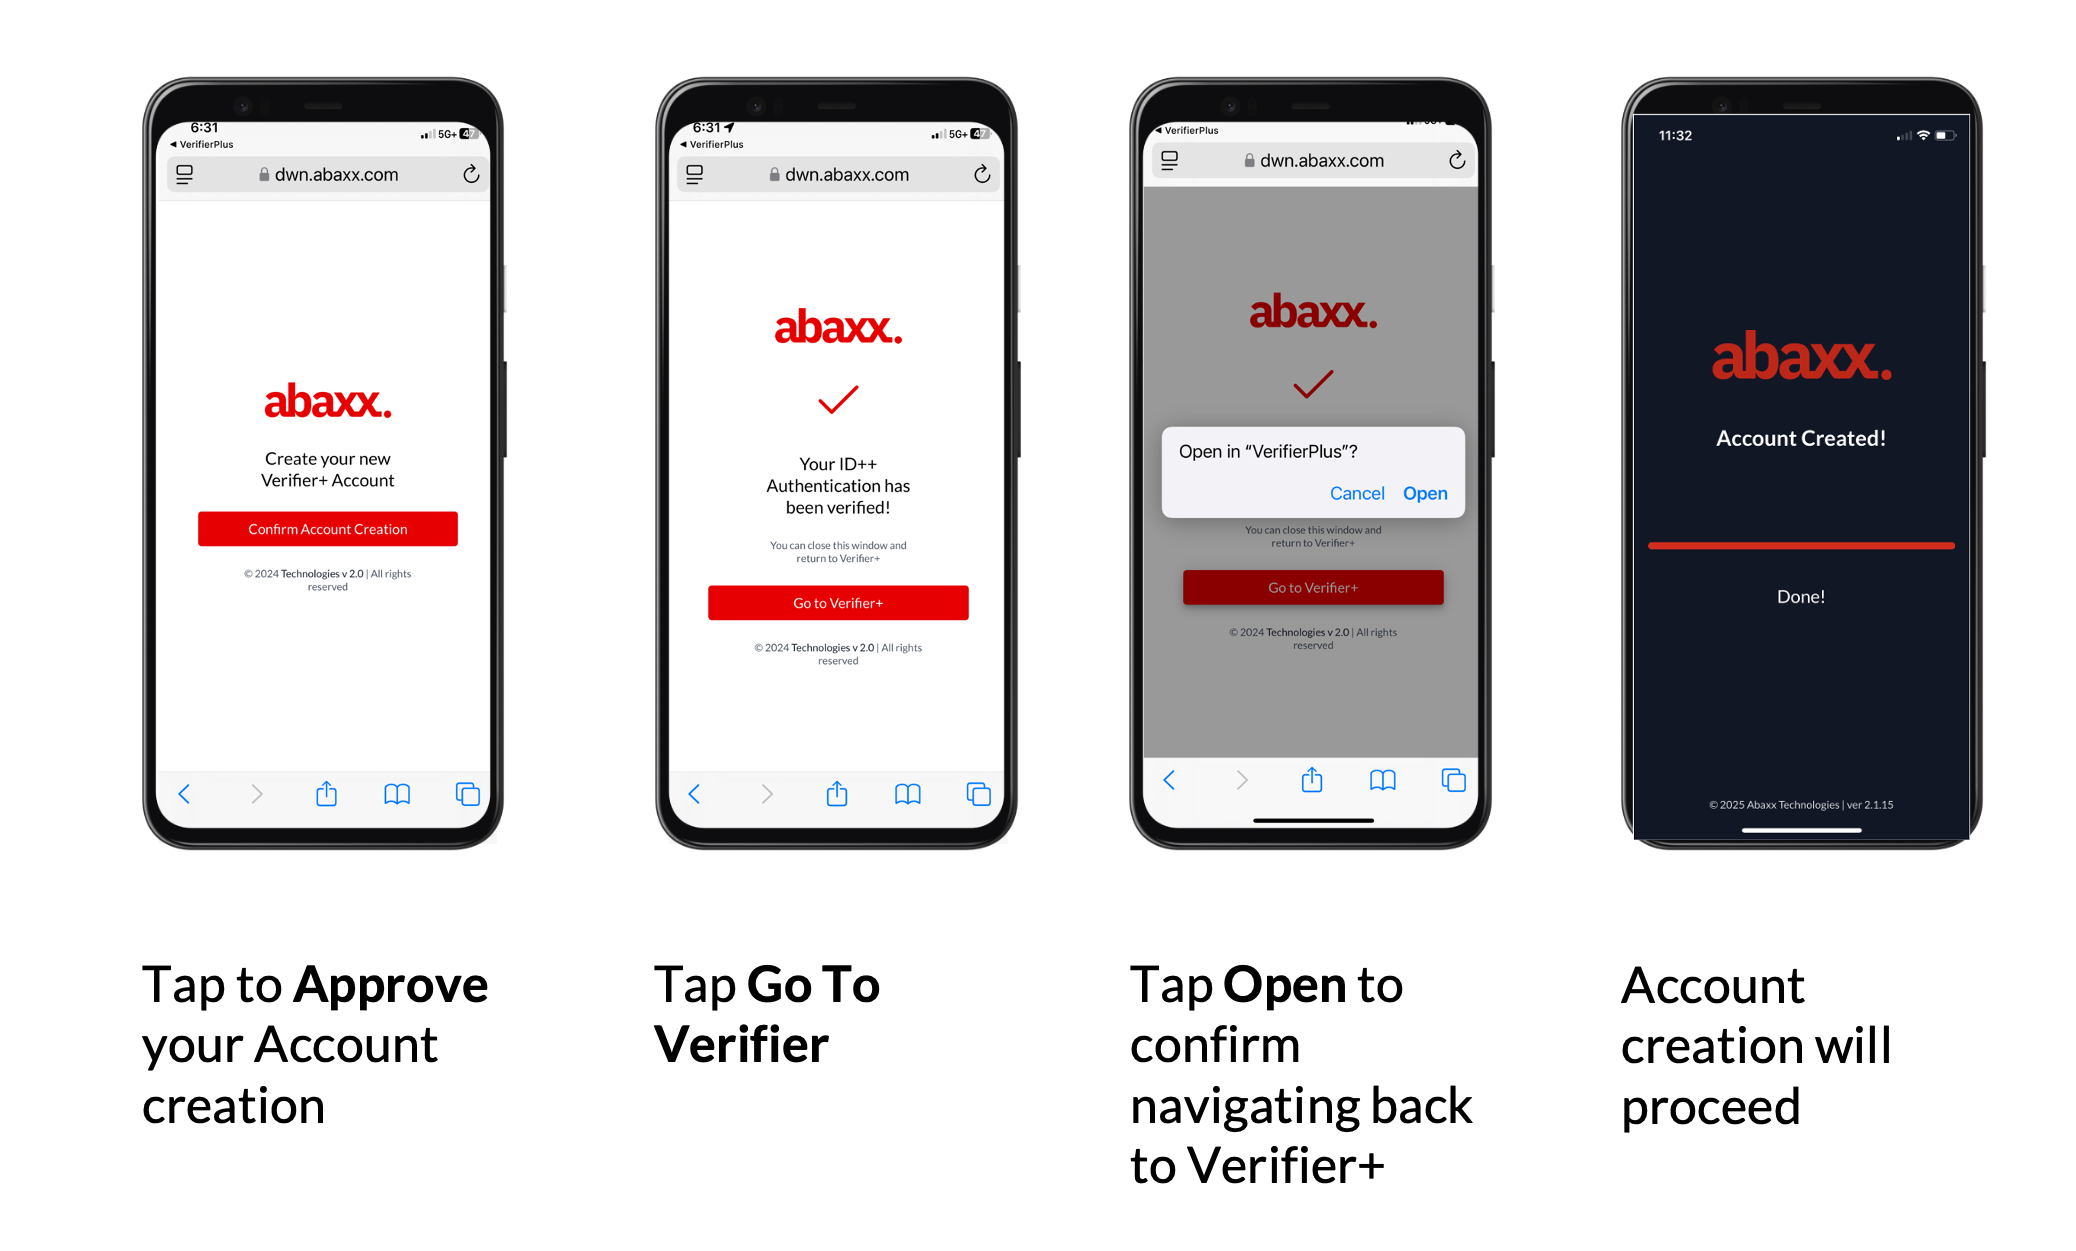
Step 5: Complete Verification Process
Tap the button to Approve your account creation and return back to the Verifier+ app.
Tap Go to Verifier+
Tap Open to confirm navigating back to Verifie+
Now your ID++ authentication has been verified and your account is created.

Securing your Verifier+ account
Step 6: Securing your Verifier+ account
Swipe to enable Face ID (optional)
Enter your Apple or Google phone PIN (this is your PIN and Abaxx does not have access to it)
Click Continue to set up account recovery
Click the Copy button to save or send yourself your recovery passphrase
Tap Next to proceed to customizing your account
Conclusion:
You have now created a new Verifier+ account. Proceed to personalize your account and add
credentials.
Need assistance or have a question? Contact our support team at support@abaxx.tech for help.